Wednesday, March 31, 2010

Cooking Italy: Spaghetti Carbonara


I had originally thought I would run out of time to make this recipe. That is until I told my boss I was coming in late so that maintenance could come in to see where a leak was originating several floors back that then turned into them not showing up and the entire work day being shot all to pieces.So, after fuming and complaining to my sister via email, I figured I might as well be productive in the kitchen so I wouldn't take out my boredom on buying unnecessary bakeware online. And since I am a fan of bacon, garlic and spaghetti this seemed to be culinary destiny.

Overall, this was a fairly simple recipe to make. I took a few shortcuts and left the garlic in the pan after I had sauteed it in olive oil figuring a little garlic never hurt anyone.  And I probably ended up with a little more than half a pound of bacon in the pan but it was a sacrifice I was willing to make considering I always end up picking bits of cooked bacon out of any recipe I try.

This was a lot better than I had been expecting it to be without a traditional tomato based sauce. I went with a white pepper and loved how light it tasted. Would definitely make this again. 


Spaghetti with Carbonara Sauce 
1 1/4 lbs cooked spaghetti
1/2 pound pancetta or good quality bacon ( I went with the latter)
4 garlic cloves
3 tbsp extra virgin olive oil
1/4 cup dry white wine
2 large eggs
1/4 cup romano cheese
1/2 cup parmigiano reggiano cheese
black pepper
2 tbsp parsley 

  1. Cut bacon into 1/4 inch strips
  2. Sautee garlic in olive oil until golden
  3. Cook Bacon in pan and cook until slightly crispy at edges. add wine, lett bubble for 1-2 minutes and turn off heat. 
  4. Break 2 eggs into serving bowl to be used for tossing later. Whisk lightly and add the cheeses, pepper and chopped parsley. Mix well. 
  5. Add cooked drained spaghetti to bowl and toss, coating well
  6. Briefly reheat bacon over high heat, turn out into bowl,  and toss thoroughly
  7. Serve immediately

Monday, March 29, 2010

Potage Parmentier Soup

 I've been taunted by the leeks in my fridge.

 A few weeks ago, I had completely blanked on including the braised leeks that were to go along with a lemon roasted chicken I was making with the Cooking Italy blogging group. So I threw the leeks back in the fridge with the goal of making Potage Parmentier, something that's intrigued me since I read about it in "Julie & Julia." 

But as it often the case with me when I'm busy, the leeks languished in the fridge until they reached the point of no return today. As in, they were clinging desperately to the very last of their usable shelf life. And since I had spent what I thought was a ridiculous amount of money on them at the time, I figured today was the day. It was P-Day. 

What I love most about the soup is how easy it is to assemble. Apart from the prolonged soaking/scrubbing one must do with the leeks due to the sandy bits in them. All you need is leeks, potatoes, water, cream or butter, salt and chives or parsley. The most complicated part of it was having to blend the soup in batches as I don't have a huge blender. I know that is a no no in Julia's eyes but I was not about to mash them into tiny bits. I have my limits after a long day of doing pretty much nothing at home. 


Potage Parmentier (Potato and Leek Soup) – Julia Child 

1¼ hours | 15 min prep
SERVES 4
  • 1 lb potato, peeled and diced (I leave skins on)
  • 3 cups leeks, thinly sliced (white and tender green parts only)
  • 2 quarts water
  • 1 tablespoon salt
  • 4-6 tablespoons whipping cream or 2-3 tablespoons softened butter
  • 2-3 tablespoons minced parsley or chives
  1. Simmer vegetables, water and salt together, partially covered, 40-50 minutes until vegetables are tender.
  2. Mash the vegetables in the soup with a fork, or puree in blender. Correct seasoning.
  3. Off heat and just before serving, stir in cream or butter by spoonfuls. Pour into a tureen or soup cups and decorate with the herbs.
  4. Good hot, cold or room temperature.

Sunday, March 28, 2010

Weekend Cat Blogging


Queen Katie waving to her insolent but loyal subject (me)and everyone else who visits her at my blog!

Check out everyone's feline kids over at Sidewalk Shoes!

SMS: Alas, We Have No Pavlova!

We have no pavlova today!

Sorry. I've got the song "Yes, we have no bananas" going through my head. I have no idea why ;)

Anyway...I did not participate in this weeks recipe, Pavlova Peach Melba,  with my fellow bloggers over at Sweet Melissa Sundays due to my lingering irrational fear of egg whites but please check out everyone else's postings as this looks like a delicious dish. The recipe was picked by Patty over at Birding Blossoms and Baking and can be found on her blog.

Saturday, March 27, 2010

BB: Caesar Club Sandwich


I have been pretty bad lately about keeping up with my fellow bloggers over at the Barefoot Bloggers site for a few months. Which is really a shame, as they've been picking some really good recipe over there that I know for sure taste a whole lot better than the cereal which is my stand by dinner after a long day at work. So when I saw this one, I was happy because I love caeser salad. At least I love the dressing, which I've found makes a lovely dip for crackers. Putting that together with a chicken sandwich was culinary genius for me.

I kept fairly close to the recipe which is always a bit of a shock, even picking up anchovy paste and sun dried tomatoes. The only exceptions I really made were to use a wrap instead of ciabatta bread and to go with bottled lemon juice versus squeezing my own (I know, someday I will get there. I've heard it's lovely in recipes). Also, I went with boneless chicken breasts since I already had that in the freezer.

Now my dressing was a little runny I thought so I might have been a little off on some of my measurements. But OH MY...this was good. Really good. Makes me wonder what the caterer we use for some events at work is putting in their caeser dressing because this was so much more tastier and zingier and just more of everything. It makes me a convert over to homemade dressings for sure. And the chicken was perfect just as it was..now I'm starting to realize that I may be completely inept when it comes to grilling chicken on my foreman grill but I can do quite a decent job with roasting.

This would be an easy enough recipe for me to put together on a weekday night, assuming I did some prep work in the morning  and had the ingredients on hand. It looks great and tastes wonderful.


Caesar Club Sandwich (Ina Garten)

  • 2 split (1 whole) chicken breasts, bone in, skin on
  • Good olive oil
  • Kosher salt
  • Freshly ground black pepper
  • 4 ounces thinly sliced pancetta
  • 1 large garlic clove, chopped
  • 2 tablespoons chopped fresh flat-leaf parsley
  • 1 1/2 teaspoons anchovy paste
  • 1 teaspoons Dijon mustard
  • 1 1/2 tablespoons freshly squeezed lemon juice
  • 1/2 cup good mayonnaise
  • 1 large ciabatta bread
  • 2 ounces baby arugula, washed and spun dry
  • 12 sun-dried tomatoes, in oil
  • 2 to 3 ounces Parmesan, shaved

Directions

Preheat the oven to 350 degrees F.

Place the chicken breasts on a sheet pan skin side up. Rub the chicken with olive oil and sprinkle with salt and pepper. Roast for 35 to 40 minutes, until cooked through. Cool slightly, discard the skin and bones, and slice the meat thickly. Set aside.

Meanwhile, place the pancetta on another sheet pan in a single layer. Roast for 10 to 15 minutes, until crisp. Set aside to drain on paper towels.

Place the garlic and parsley in the bowl of a food processor fitted with a steel blade and process until minced. Add the anchovy paste, mustard, lemon juice, and mayonnaise and process again to make a smooth dressing. (Refrigerate the Caesar dressing if not using it immediately.)

Slice the ciabatta in half horizontally and separate the top from the bottom. Toast the bread in the oven, cut side up, for 5 to 7 minutes; cool slightly. Spread the cut sides of each piece with the Caesar dressing. Place half the arugula on the bottom piece of bread and then layer in order: the sun-dried tomatoes, shaved Parmesan, crispy pancetta, and sliced chicken. Sprinkle with salt and pepper and finish with another layer of arugula. Place the top slice of ciabatta on top and cut in thirds crosswise. Serve at room temperature.

Friday, March 26, 2010

Ten Things I Just Don't Get

1) How I can spent hours cleaning the kitchen last weekend and not being able to tell a difference today.

2) Why I can find amazing bursts of energy when it comes to shopping but cannot get going this morning for exercising.

3)  Why there is never anything good on TV until I need to organize my house

4) Why my maid never shows up to work - oh wait, I'm my maid. Damn.

5) Why my coworker spent the better part of the morning yesterday worrying about where her tape dispenser had gone...out loud.

6) Why my boss just doesn't get that my cat needs me at home for company and lets me take time off accordingly.

7) How I can have a freezer full of food and not be able to find anything that looks good. 

8) Why science hasn't invented brussel sprouts that taste like chocolate and make me want to eat them instead of run away from them

9) Why I, the only person in my family who likes to cook and bake, always ends up in apartments without dishwashers while my sister, who does not, always does

10) Why cookbooks aren't scratch and sniff...it would save me a lot of calories

Sunday, March 21, 2010

SMS: Double Crusted Caramel Apple Pie


Several months back, after seeing some of my fellow bloggers posting about their baking adventures with the "The Sweet Melissa Baking Book" I went right out and bought the book and have been drooling over it ever since then. So I'm happy to be a part of this delicious blogging project over at Sweet Melissa Sundays. For my first week with the group, we baked Double Crusted Caramel Apple Pie picked by Susan over at Baking with Susan who also has the recipe posted on her blog.

I admit. I had some issues with the pie crust. I didn't know until after I started working on the recipe that I was out of flour completely. So I substituted cake flour for it instead as Melissa stated that it was okay to use it if necessary. And maybe that was the reason that I could not for the life of me get a decent dough rolled out. I followed all the steps with chilling the ingredients and the dough but after putting it in the freezer, I got a harder dough. So I managed to squeeze out two mini pies and called it a day.   I think next time I would make the pie crust in advance and let it rest a little longer than the recipe called for. So please, keep all this in mind and forgive my frankensteinish pie crust appearance. I think with practice I will get a better feel for the dough and the presence of mind to make sure I have flour on hand the next time I make it :)

I was pleasantly surprised that the caramel turned out pretty good. I've not worked with that before on my own and having done so now I can't see going back to store bought caramel sauce again. Then again, I am a caramel fan and it's hard to find one that won't appeal to me on some level. This one was wonderfully buttery and I loved it. I might get finer sugar next time I make it as I did get a few tiny crunch bits of sugar that didn't dissolve during the cooking from the bottom of the pan.

Based on the reviews of those who were far more organized than I was, I cut back on the baking time and baked it at 350 degrees for approximately 30 minutes until it was wonderfully golden brown.  I have a huge sweet tooth, only slightly under lock and key lately, so I omitted the lemon zest so that the pie would have a sweeter taste.

Overall,I liked the pie. I especially  feel like the queen of the world having challenged pie dough today.

Saturday, March 20, 2010

The Cake Slice: Pineapple Upside Down Cake


This month my blogging friends and I from The Cake Slice voted to make a pineapple upside down cake. And truth be told, I was relieved. A simple one layer cake with no frosting was exactly what I needed on a busy baking weekend.The only real danger for me was the maraschino cherries as I have bought home 3 jars already now (including the quick run out to the store in the messy weather we're getting hit with today) - and I've eaten 2 1/2 of the jars, leaving just enough for today's cake. So a big sigh of relief that I won't have to deal with the cherries around the house hopefully for a long time :)

The topping of this was absolutely to die for. All that buttery sugary carmelized goodness plus the pineapple was perfect for me. The cake I'm just not sure about. I cooked it at the right temperature for 35 minutes and it was golden brown...in fact it looked more than just a little so I took it out. Maybe a few minutes more coking time would have made a difference because it seemed like a very dense cake to me...I had been hoping for a lighter taste but it seemed a little gummy to me.

I think I might try this again, but make a few minor changes like add some more pineapple juice to the cake to give it a bit more flavor. I might also try another version of pineapple upside down cake to see how that compares.

Overall, I'd give the cake a solid B. There's room for improvement but overall, for my first pineapple upside down cake, I'm pleased with how it turned out. And appearance wise, it was gorgeous.


March’s Cake: Pineapple Upside-Down Cake
(Recipe from Southern Cakes by Nancie McDermott)
Pineapple Topping
One 20-ounce can pineapple rings, with their syrup or juice
4 tbsp cold butter
2/3 cup firmly packed brown sugar
10 maraschino cherries

Cake
1½ cups all purpose flour
¾ cup sugar
1½ tsp baking powder
½ salt
½ cup milk
4 tbsp butter, softened
1 egg
1 tsp vanilla extract
Method 
Heat the oven to 350F.

To make the topping
Drain the pineapple well, reserving 2 tablespoons of the juice or syrup for the cake batter. Melt the cold butter in a 10 inch cast iron skillet over medium heat. Or, put the butter in a 9inch round cake pan and put it in the oven for a few minutes as the heat melts the butter.

Remove the pan from the oven or stove and sprinkle the brown sugar over the buttery surface. Place the pineapple rings carefully on top of the scattered brown sugar and melted butter, arranging them so they fit in 1 layer. (You may have a few left over). Place a cherry in the centre of each ring, and set the pan aside.

To make the cake
In a large mixing bowl, combine the flour, sugar, baking powder and salt. Use a fork to mix them together well. Add the milk and butter and beat well with a mixer, scraping down the bowl once or twice until you have a thick, fairly smooth batter, about 1 to 2 minutes.

Add the egg, reserved pineapple syrup or juice and the vanilla. Beat for 2 minutes more, stopping once or twice to scrape down the sides.

Carefully pour the batter over the pineapple arranged in the skillet or cake pan and use a spoon to spread it evenly to the edges of the pan. Bake for 35 to 40 minutes until the cake is golden brown and springs back when touched lightly in the centre. Cool in the skillet or pan for 5 minutes on a wire rack.

With oven mitts, carefully turn out the warm cake onto a serving plate by placing the plate upside down over the cake in the pan and then flipping them over together to release the cake onto the plate. Serve warm or at room temperature.

Monday, March 15, 2010

MSC: Lemon Meringue Cupcakes

It's been awhile since I've baked along with the group over at MSC (Martha Stewart Cupcakes). So this month was the perfect one for me to jump back in with as I am a huge fan of lemon. Lemon Meringue Pie, Lemon Cakes...you name it, I'm your girl to help eat it. So I was happy to see that Megan from My Baking Adventures had picked this recipe for March.

Because of my great love for lemon meringue pretty much anything and including pie, I planned on making mini cupcakes and taking some of them along to dump on my coworkers to avoid eating the entire pan myself (I know it sounds like a stretch but give me a few days and I can pull that off very easily).  The only problem was that I had a few absent minded moments which greatly undermined the quality of the recipe. Well, really one (the other one tasted pretty darn good to me) but the one that was affected...well, that was a bit of a doozy.

As in forgetting to put the eggs in. I know. I have no idea what was going through my head but I mixed the ingredients exactly (almost) as it was called for and was perplexed because the batter was so thick. So i started to improvise. Like adding milk until the consistency was closer to normal. Which was right around the time the lightening bolt hit and I realized I had forgotten the egg. Needless to say, the batter was runny,which require adding more flour and the poor cupcakes never quite recovered from this debacle.

Now as for the curd, oh yum. i would definitely make this again. I kept looking for excuses to dip the spoon into the mix as it was cooking to taste a little bit more. And the end result was awesome. Tart with a hint of sweetness. Never mind the fact that I forgot to put the butter into it. It was still great in my eyes.

And I'm sorry, but I am not ready yet to overcome my fear of cooked frostings so I skipped the meringue part altogether. I really need to get a kitchen blowtorch to cut back on using that as one of my excuses too. 

Overall, not bad. The cupcake due to my mangling didn't have the lemon taste that I had been expecting but the curd more than made up for it.

Please check out my fellow bloggers over at MSC to see how their baking turned out!

Thursday, March 11, 2010

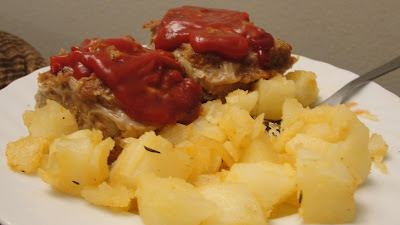
BB: Individual Meat Loaves


I've often made meatloaf by cheating a little (using a box of stuffing) but never really from scratch. Mostly because of laziness...much easier just to dump everything in a bowl, mush it up, put it in a loaf pan and be done with it. 5 minutes prep time total at best. So when I started out making this recipe I was slightly curious how it would turn out. 

In a word, yummy. I thought it was one of the juicier, subtly flavored meatloaves I've had in awhile. A little extra ketchup goes a long way with this one. 

I made only a few minor changes to the recipe (unusual for me). I went with ground turkey over beef as it was cheaper at the store and as I'd forgotten to buy fresh thyme, I used dried thyme instead. As my cookie sheets were all in use, I made the loaves in little mini square cake pans and it turned out perfect. Thumbs up all around.

 Ina Garten's Individual Meat Loaves

Ingredients


  • 1 tablespoon good olive oil
  • 3 cups chopped yellow onions (3 onions)
  • 1 teaspoon chopped fresh thyme leaves
  • 2 teaspoons kosher salt
  • 1 teaspoon freshly ground black pepper
  • 3 tablespoons Worcestershire sauce
  • 1/3 cup canned chicken stock or broth
  • 1 tablespoon tomato paste
  • 2 1/2 pounds ground chuck (81 percent lean)
  • 1/2 cup plain dry bread crumbs
  • 2 extra-large eggs, beaten
  • 1/2 cup ketchup

Directions

Preheat the oven to 350 degrees F. Heat the olive oil in a medium saute pan. Add the onions, thyme, salt, and pepper and cook over medium-low heat, stirring occasionally, for 8 to 10 minutes, until the onions are translucent but not brown. Off the heat, add the Worcestershire sauce, chicken stock, and tomato paste. Allow to cool slightly. In a large bowl, combine the ground chuck, onion mixture, bread crumbs, and eggs, and mix lightly with a fork. Don't mash or the meatloaf will be dense. Divide the mixture into 6 (10 to 11-ounce) portions and shape each portion into a small loaf on a sheet pan. Spread about a tablespoon of ketchup on the top of each portion. Bake for 40 to 45 minutes, until the internal temperature is 155 to 160 degrees F and the meat loaves are cooked through. Serve hot.

Monday, March 8, 2010

Mondays with Katie: The Human is Hopping


She calls it exercising. It seems to involve kicking and hopping and walking and spinning. I'm most perplexed by it. I tried to help her by cheering her on but she seemed distracted by the meowing.

You didn't hear it from me, but I should announce that mom has lost weight too. She's down 6.5 lbs total so far. And unless I'm mistaken (very doubtful) she's been drinking her recommend daily quantity of water.

Sometimes, the humans can make a cat so proud.

Purrs,
Katie

Sunday, March 7, 2010

CI: Roast Chicken with Lemons

Today's recipe came from the Cooking Italy Bloggers who are working their way through Marcella Hazan's "Essentials of Classic Italian Cooking."

And I have an embarassing confession.

I'm almost ashamed to even admit to it.

But I have never in my life roasted a chicken until today.

Another one of those weird cooking quirks that has developed over time in  my life. I was just convinced that I simply could not make a roast chicken. I don't remember any post traumatic roast chicken issues so I don't know where it came from. So I was a little concerned about this recipe but went ahead with it anyway considering how simple it was to make and the limited ingredients: Chicken, salt, pepper and lemons. I figured it had to be somewhat foolproof even for someone like me.

I am so glad I tried this. It had to have been one of the best roast chickens I've had in a long time. Juicy and tasty, with the meat almost melting in my mouth. This would definitely be my go-to recipe for any roast chicken needs in the future.

ROAST CHICKEN WITH LEMONS
3-4 lb chicken
Salt
Freshly Ground Pepper
2 small lemons ( I could not find them so I used one larger lemon)

Preheat oven t0 350 degrees. Wash chicken throughly (inside/outside) and let dry, slightly tilted for water to drain. Rub down with salt & pepper, making sure to also salt/pepper the cavity. Wash lemons in cold water, dry and roll until softened. Prick with fork or toothpick approximately 20 times. Place lemon inside cavity, and loosely close cavity with toothpicks or kitchen twine.

Cook for approximately 30 minutes, flip chicken over, raise temperature to 400 (I forgot this) and cook an additional 30 minutes approximately (may require slightly longer cooking time for bigger bird).Serve immediately. Chicken is also delicious (I can agree with that!) served later at room temperature.

Thursday, March 4, 2010

FINALLY!

 It's baseball season!

Or at least it's spring training. I blame my mother for the baseball crazies. We went to a lot of games growing up and my mother to this day is not to be trifled with if her team is losing. My sister and I actually thought she was going to disown us last year when we went to see the White Sox play against the Milwaukee Brewers and cheered for the White Sox. That, to my mother who is a diehard brewers fan, was sports heresy. And I was the bad daughter who led my sister astray. Although, really it isn't my fault. It's the White Sox fault for winning the 2005 World Series. I turned on the game to to mock them at first  and ended up being a fan by the end.

And I even stayed one during those not so cheerful seasons after.

I got home in time today to watch the first game of spring training. At least I got to see the final two innings. My baseball fix has been satisfied for now.

Go Sox!

Tuesday, March 2, 2010

Bacon Chocolate Chip Cookies


I love my blogging friends and the blogging community. 

Why, you may ask? 

Because they are the geniuses who find and blog about recipes that I may not have come across otherwise on my own. And because of them, I am the queen of the office for a day because I bought them in to share with everyone. 

I was tipped to this delightful cookie by Cathy over at Accountants Can Cook?  who herself found this over at Sticky, Gooey, Creamy, Chewy. 

Be very careful when making this recipe. And by very careful, I mean make extra bacon because you ARE going to be nibbling on it and may be lucky to end up with eight pieces to put in the recipe. 

Now I am a bacon lover so this was right up my alley overall. And I will warn you that as good as they are the first day, they will taste even better the second day if you can hold onto them that long. 


BACON CHOCOLATE CHIP COOKIES

Cookie Ingredients:

1/2 cup granulated sugar
1/2 cup firmly packed light brown sugar
8 tablespoons (1 stick) unsalted butter, cold, cut into 1/2-inch pieces
1 large egg1 teaspoon vanilla extract
1/2 teaspoon baking soda
1/2 tsp salt
1 1/4 cups all-purpose flour
1 cup semisweet chocolate chips
1 cup Candied Bacon Bits (recipe follows)

Directions:
1. Preheat oven to 325F. Line three baking sheets with a Silpat liner or parchment paper.
2. Beat the sugars and butter together until smooth. Mix in the egg, vanilla, and baking soda. Whisk together the flour and salt, then sift them into the batter. Stir in the chocolate chunks and bacon bits.
3. Using a small cookie scoop or a teaspoon, scoop the cookie dough into small balls, about 1-inch in diameter, and place them 2 inches apart on each of the baking sheets.
4. Bake for 14-16 minutes, or until pale golden brown. Rotate sheets halfway through baking for even browning. Remove from the oven and cool on a wire rack.
The cookies can be stored at room temperature in an airtight container for 3-4 days, if they last that long!
Makes about 3 dozen 2-inch cookies.

Candied Bacon Bits adapted from David Lebovitz

Ingredients:
8 strips bacon
1/2 cup light brown sugar

Directions:
1. Preheat oven to 400F.
2. Lay the strips of bacon on a baking sheet lined with a silicone mat or aluminum foil, shiny side down.
3. Sprinkle half of the brown sugar evenly over each strip of bacon.
4. Bake for about 15 minutes. Midway during baking, flip the bacon strips over and drag them through the dark, syrupy liquid that’s collected on the baking sheet. Add the rest of the brown sugar and continue to bake until a deep mahogany color. Remove from oven and cool the strips on a wire rack.
5. Once crisp and cooled, chop into little pieces, about the size of grains of rice.
Candied bacon bits can be stored in an airtight container and chilled for a day or so, or stored in the freezer a few weeks ahead.

Monday, March 1, 2010

Mondays with Katie: A Couch of My Own


My apologies to all...the human has been slacking with her postings. On the positive side, she can now talk coherently instead of squeaking. And she was quite happy today after speaking with the bank because they refunded her $89.00 for some overdraft fees because she used the wrong account to pay for something by accident.

But alas, she seems to be going off the deep end. Right now she's sitting with a bag of frozen spinach on her left hand because she'd burned herself with a cookie sheet. Before it had been frozen corn. It must be a human thing, this obsession with vegetables. However, due to my kindness in taking over the loveseat and adopitng it as my personal couch, she is free to sit on the regular couch and medicate herself with frozen foods.

Not to worry though..I will take very good care of the human until she is feeling better from this latest crisis.

Purrs,
Katie